Well, it’s been some time since I’ve used a drill press…. Probably year 10 at school, which was some time ago now…. However, harking back to my days of old, I managed to get some pretty good results.
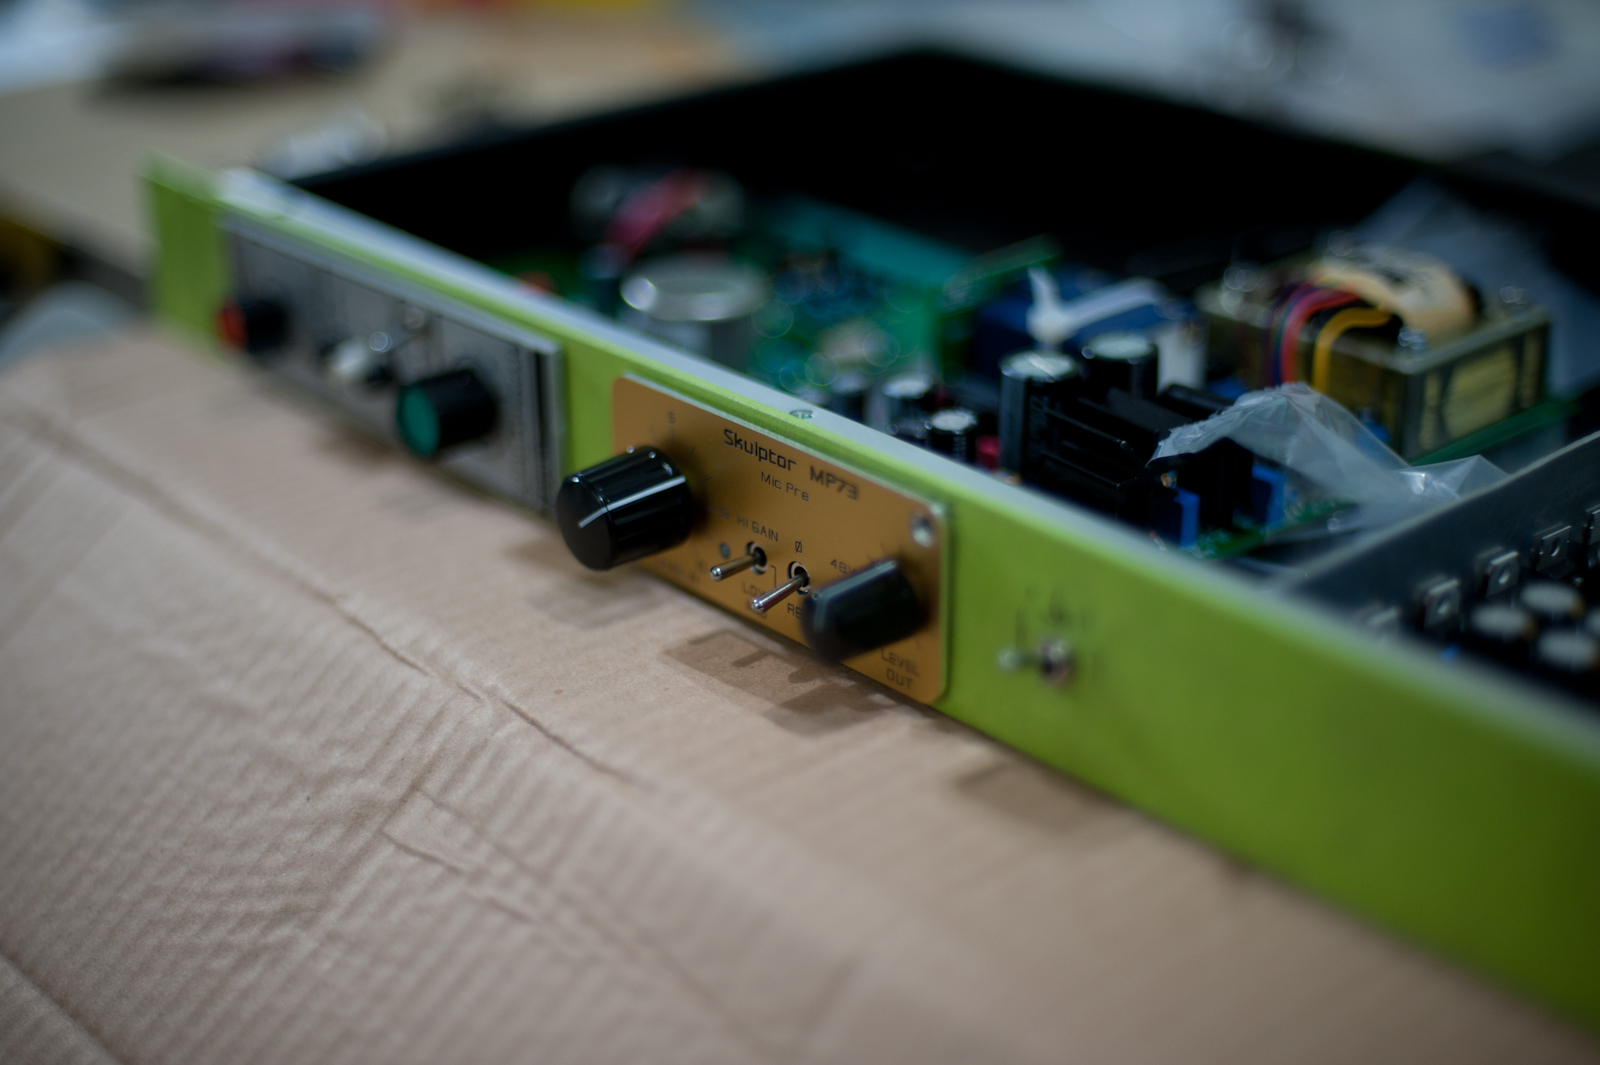
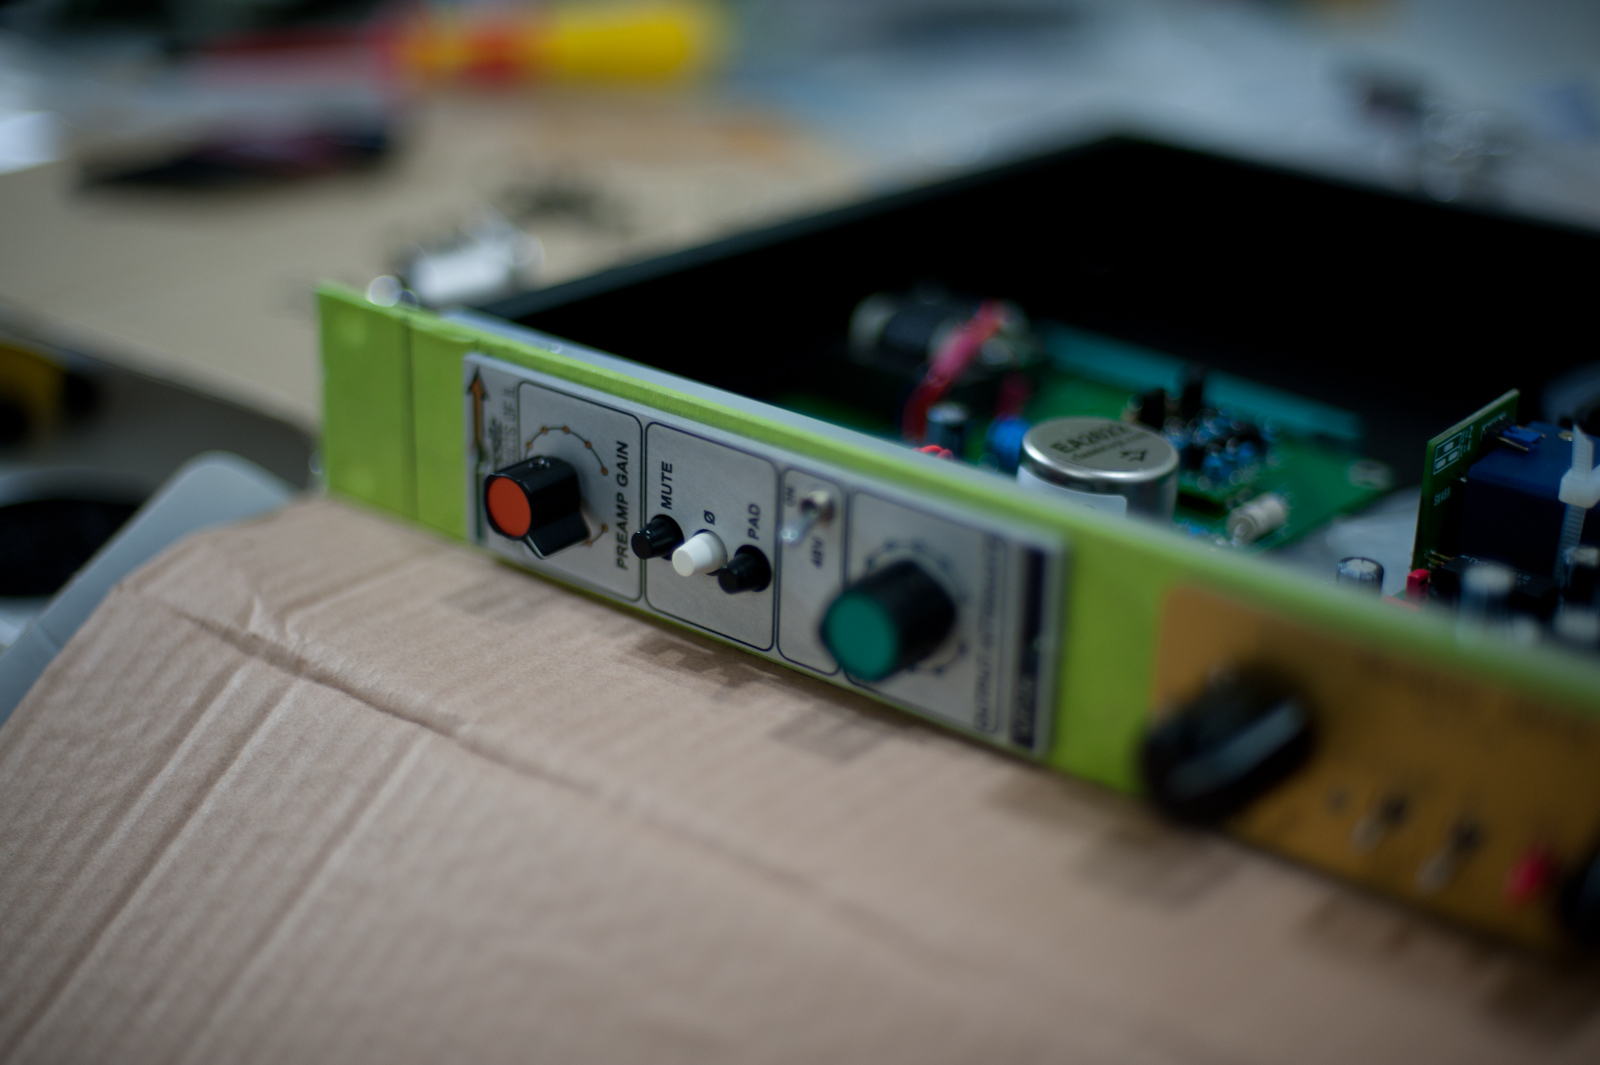
Those who have been keeping up to date on this blog will know I just finished soldering together Sound Skulptor MP73 and ClassicAPI VP26 preamp kits. This post is about how I’ve been able to successfully fit them into a 1u rack case.
I got the rack case from Altronics in Sydney: http://www.altronics.com.au/index.asp?area=item&id=H5011
Working at the wonderful Robots and Dinosaurs Hackerspace in Sydney, the first step suggested to me by my mate talsit, was to put tape ( it’s green! ) across the front of the aluminum panel. This was so that if(/when) I slipped, I wouldn’t need to shed a tear, as underneath it would be protected.
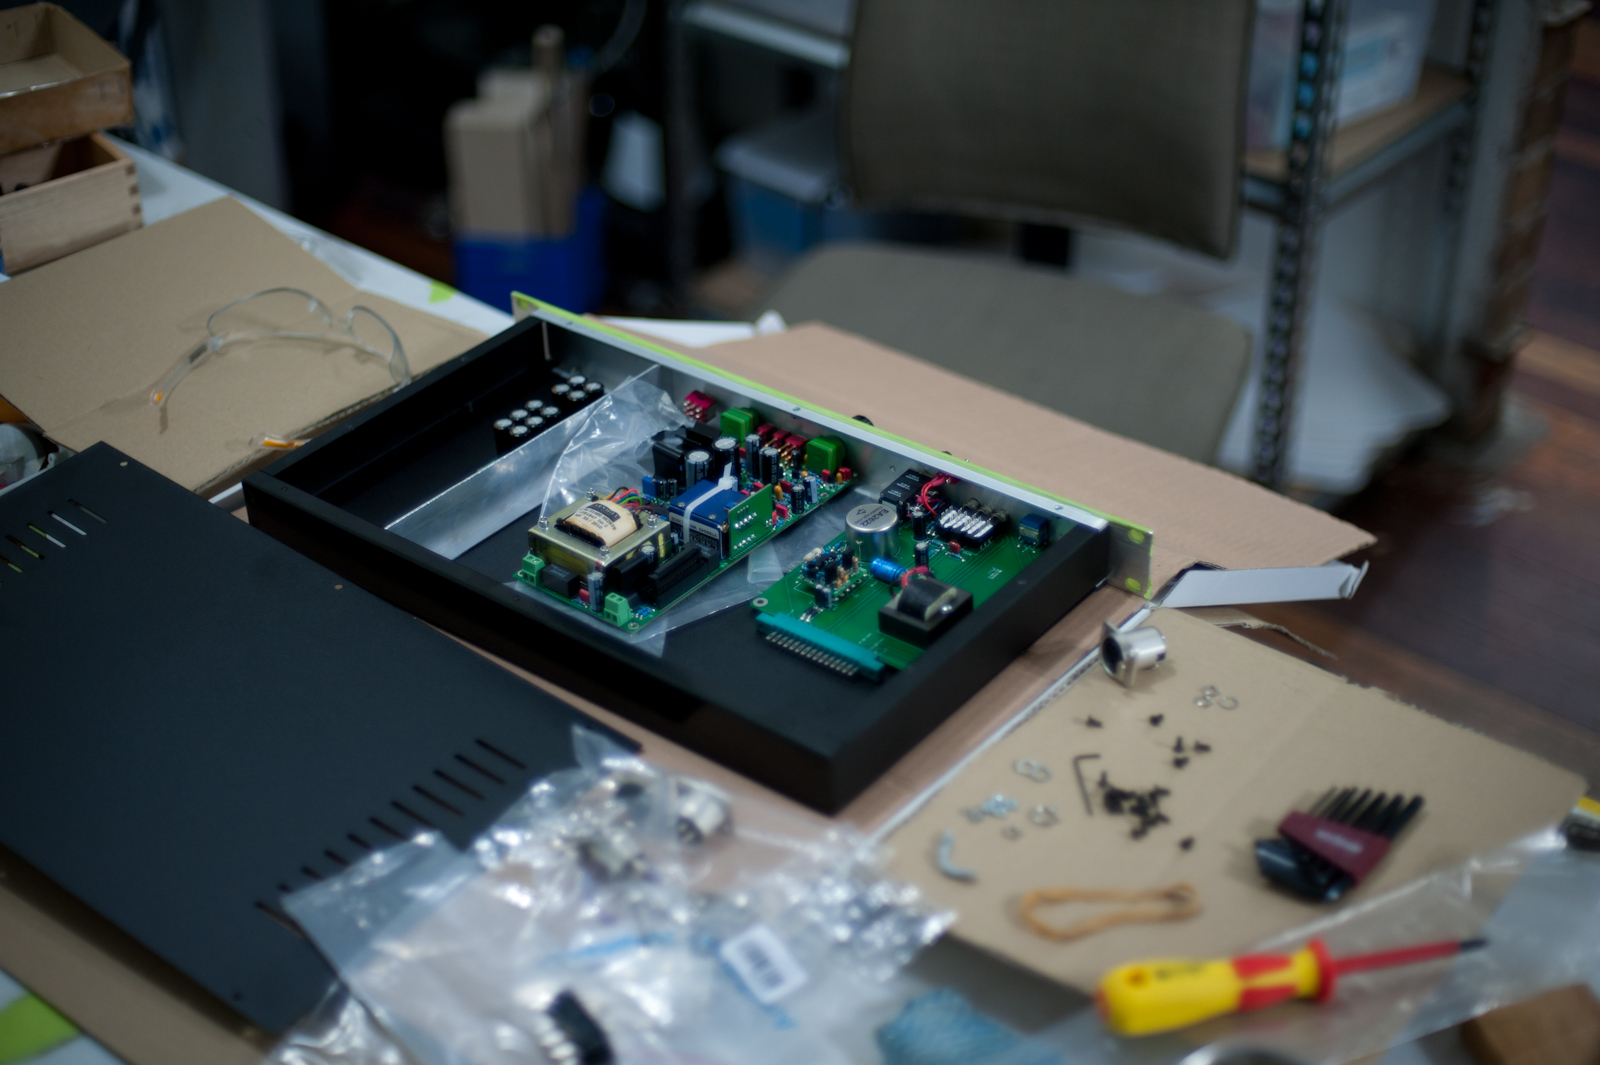
With previously acquired Ninja hack-sawing skills ( and a really cool hacksaw he had ), talsit helped by cutting to size an Aluminium L-panel that I found at Bunnings to fit as a divider and as shielding protection between the power-supply and sensitive pre-amps, along with helping to mod the case slightly to allow room for the preamp front panels ( which involved some brutal tearing out of screw-flanges with a large pair of pliers – kind of like going to an Aluminium dentist…. )
Next I took the two front panels and laid them to the left middle of the panel. This was to make room for the power supply that’s to sit to the right of the case, along with a linked/independent toggle for running the pres both from input A, or independently from A and B ( it basically will bridge input A to preamps A and B so that one source can run separately through both preamps ).
I then proceeding to mark with pen all of the holes. From there I used a digital caliper to measure each and every hole interior diameter. Unfortunately the Hackerspace did’t have the extremely strange drill sizes I needed – but this was very much a blessing in disguise. Since I had to mark the centers of all the holes by eye, I knew I’d be out all over the place with sizes. So I rounded up to the nearest bigger size. This allowed me to have the play across the whole panel I needed, and the accumulative error was spread out.
Much to my surprise, after drilling it, everything fit perfectly, first time, with no modifications or tears. Amazing considering how inaccurately I thought I was drilling everything….
I’m still waiting from element14 for some key parts to ship, but, the front is basically done ( sans power switch ), and the rest of the case can be drilled in another Hackerspace session.
Here are some photos of the results and the anticipated case layout – including the lovely green tape ( which will be removed and replaced by a bright red front panel, which I’ll send to be anodized when it’s fully finished ) 😉


Stay tuned for Part 2 where I hope to finish preparation of all of the holes, then Part 3 where I’ll solder it all together and test it….
WAHHHHHHHHHHHHH meow! loves it!
Wow Luke!
Awesome stuff! I will have to drop by every once and awhile to see what’s new! You have quite a set of amazing talents! Thanks for the great music and electronics!
Take care!
Allen
The Synth Spa